Hello All:
Well as many of you know I am involved in the UWA Design & Flagship Challenge, a yearlong monthly contest that will finish up here in early October with the final winners chosen from the monthly picks. So why it's still fresh in my mind and an ongoing project I am going to do a restrospective look back of this truly wonderful event.
First, Am I glad it's over well truthfully yes, I am it's been one long haul with many ups and downs. As any artist can tell you place a large portion of time, effort, and yourself into any project and then have it be judged by others who not all are familiar with the SL world or the application of the project you are attempting to do and there will always be mixed opinions that may not always coincide with your own.
But on the other side of the coin is experience of meeting new individuals, being exposed to different art forms and enjoying the camaraderie of the UWA group itself. Over the year the baseline of the art quality of the group as a whole was raised to a much higher level. The amount of artist participating was a true surprise, to see month in and month out well over 70 art projects being shown was a great nod to the arts in SL itself and the creative individuals behind them.
On the Flagship side it was nice to see some finally grasp the true nature of the contest and build to the requirements of the contest. To those who entered to be seen or show off their (store, club, cool build) I hope you try better the next time, I was a letdown to see these types of builds in a contest specifically designed to represent a real life project.
Over all the contest was run in very professional manner, when it was broke IM JJ and cry and it got fixed, poor JJ the effort, time and headaches as the chief janitor will never truly be paid back to this man. But to be the individual who oversees the largest In-World virtual art and design competition in the world is sort of a cool thing that I truly believe was the last thing on his mind those many, many months ago when he said let’s do a few of the buildings from the campus in world.
WITH UWA's ability to add different forms of art into the mix as the months went by may be the additional reason it had such great appeal to so many individuals, even those who where none artist but just patrons and friends of the artist, who truly enjoyed the monthly viewing. To those who sent out reminders to all about the People’s Choice Award? Why honestly let your art stand on its own, not on the marketing of yourself to others.
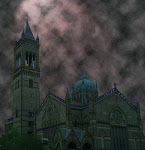
Finally, a plea to all to take the time and go visit the Flagships Builds that are up across the SL grid at a dozen separate Sims. This is a very generous offer by all who have given space (loss of prims, cost of hosting, possible loss of income). Having had a few builds in the contest and winning a few times it always amazed me how many individuals would say wow your build is so cool, I never saw it before, when I was at the winner’s monthly party. So take the time and you will need it to see all of them and enjoy the Flagship portion of this contest for what it is a celebration of design art and creation on a large scale.
So to UWA and all involved it’s been fun, draining, and always interesting, oh Hey JJ I have a sign that’s blocking my build can you get that moved, here’s the LM and besides that there's a .....
Good Building
Nyx
Thursday, September 2, 2010
Tuesday, August 31, 2010
Finally
Sorry for the absence from the blog it seems there was a delay in responding to my request to fix an error Blogger/Google was having with allowing me access. Glad to be back.
Nyx
Nyx
Sunday, July 11, 2010
Texturing Part I ~ The "Lost Notes"
As promised I have been trying to track down the lost Chat log from the Burniversity Seminar on Textures held July 3rd. I was able to track down the logs for the portion I had done, but sadly the notes I had placed in chat for Infiniview and Vryl where lost. This is why I recommend to all seminar presenters to please make notes and copy and paste into chat along with voicing. The issues are crashing and not everyone can hear voice all of the time. This happen with Starship he was unable to get voice to work for him, but he had prepared notes and we have his wonderful presentation to share with every one because of it.
Well here are the chat notes from the portion of the seminar I did.......
I will state I am not a texture master by any stretch of the imagination. But, I do know how to properly apply textures correctly to a prim and making multiple prims objects look right with textures covering them appropriately. I do believe that all builders and artist should know the fundamentals of how to create a texture that may be needed to fit a unique situation as they arise during building. I have created a set of textures I call the Texture Tool Box I use to help fill in sections and create on the fly created textures from existing standard work textures.
I have a few give away with these textures, they are a set of black and white, so you can color and tint them accordingly. There are a lot of different designs and looks on them allowing you to take one and apply it and stretch it to fit the look you are trying to achieve. I created this set to help me when I needed a texture that had to fit in to a build i was working on. I have used them to make many different effects.
The best place to start is to procure a texture creating program that’s affordable and workable for you. I don’t recommend going out and spending hundreds of dollars on the latest Photoshop program if you have never made a texture before. Look on the net find free upload programs, such as GIMP or sample Photoshop or other similar programs. Try the sample ones make sure before you spend dollars you can work the program and you enjoy doing it. They can be found by doing a search for them on the net.
Next spend some time learning how they work, look at the tutorials, search the net again for lessons that are out there just look, then study and try them to make sure this is something your capable of doing. If after trying all this and you discover its not for you, then your not out the dollars you may have spent on a program.
So you have got a program learned the basics and are ready to make a few simple textures. Remember if your going to sell any thing you make with these textures you do want to make sure they are not someone else’s property. So don’t go to Google or Yahoo and start copying every cool picture or texture you see they could be and are most likely copy rights associated with them.
A sense of balance is needed when creating a texture or when texturing a build. To make a clean, balanced even texture you have to make sure the texture is centered vertically and horizontally. Use the texture program to make sure the texture is lined up correctly or if you are tiling it make sure it is looks good before you upload it to SL. The emerald viewer is great for uploading a sample texture (no $10L charge) to see if it looks right. With a sense of balance you also have to consider the edges of a texture and how they look, are they outlined is the edge dark, light, or uneven check to make sure it looks right.
If after all you have done the best you can and uploaded the texture into SL and its off a little you can always tweak the texture with a small stretch to correct the error. But in the long run you will always have to stretch that texture to make it look right. So, take your time the first time is the best in the long run.
Continuity of a texture grouping is important when making textures to be used in a build. The easiest way to do this is to have a central theme that flows through all the textures in a particular set you create. This can be done in several simple ways, color, design, secondary sections or contrast parts of the texture. This helps to give the overall look of the build a uniform feel and reduces the cluttered look that some times occurs with textures that are to similar or over used when building.
Also in continuity you want to remember that applying the same texture over a large section or a repetitive section of a build (stairs) that you do want to change the application settings so it does not look like the same texture over and over in a highly repetitive pattern. By applying a contrast to the texture settings you will achieve a more realistic look to the build.
Contrast and color tinting is a trick I use allot when making textures and tinting and shading textures I have purchased. If all the textures on the build look the same and only the SL light settings add any light character to it you are not separating your build from all of the other run of the mill builds you see in SL.
When you add contrast into the textures, your build will instantly become more attractive. Contrast and tinting can be applied to textures in several ways, when creating them or with using the UI color under cursor section of the SL viewer to color tint and match the textures. A tip to remember is that when using the UI on an existing texture it will most likely be a darker shade than the one you are matching it to so you will most likely have to lighten in a shade to make it match properly. I also take and make some sections off by a small numerical setting if the color is 120 I may make the next prim 122 and the one on the opposite 119 it gives a small variation and give the build a more realistic feel overall.
While this blog deals with creating textures, all of the tips can also address when working with existing textures. So don’t be afraid to tweak, tint , shade and color textures you have. One thing I love to do is use a texture that is not related in anyway in the world to the place I used it in the build. Wall, floor, or even metals or what ever become glass or some other type of texture. This can be achieved by using the transparency or different settings in the Edit section of the Viewer. Explore push the edges create a few that look and work good for you then save them and stick them in your Texture Tool Box.
Good Building & Texturing
Saturday, July 10, 2010
Burniversity Texture Seminar I & II
Over the last two week period Burniversity has had a wonderful series of seminars dealing with the creations of Texture's. The first week we had talks on the topics of Basic texture creation and application my myself (Nyx Breen) and specific discussion on Maps and meshes by Infinview Merit and Vryl Valkyrie discussed the basics of texturing and the steps in making seamless and tilable textures. It was a well attended seminar and alot of great information and feebees where available. At the end of the blog I wil past the links to sites that where mentioned. Sadly I crashed and lost the chat logs of the seminar but I am working on getting a copy of them.
The second portion of the texture seminar had myself and Raphaella Nighfire and Starship jefferson as guest speakers the topics discussed ranged from textures and lighting to textures for clothes and Starship them was the 10 things I wish I knew when I first started making textures. The good news is we do have the chat logs condensed of this seminar. I will post them in the blog.
I want to tahnk all of the artist for their time and gifts thay gave, Infinivie and Vryl where most kind with info and freebees, Raphaella and Starship where just as kind and giving in time effort and gifts for all who attended the Burniversity learning seminars.
As for my self it was a truly enjoyable time to work with such talented individuals and share the experiences we have in SL. All of these individuals are in world creators and earn an income from Sl, yet not one asked for or expected a thing in return. Each and every one believed i tto be a special honor to share what they love with all in Sl as I do with the time I spend at Burn U and on the blog here.
Thanks to all and hers the chat we do have from the second texture seminar at Burn U.
Nyx Breen topic textures and lighting and settings:
Hello and welcome to Burniversity and the continuation of the Texture Seminar.
After the strong response and recommendations for more on texturing we are continuing with texturing part II.
This week we will be addressing a few new subjects that are part of the texture creation world.
How to light prims after they are textured, Low lag textures, textures for clothing and 10 things you need to know about texturing.
We have some great texture artist with us this week, Raphaella Nightfire a great clothing creator who has done some wickedly wonderful things with textures for clothes and Starship Jefferson who has made one of my personally favorite sets of textures and is a master of Photoshop and the magic than can be done with it.
As I stated last week I am not a texture master but I do know a few basic rules to follow when creating and using textures in-world.
As you many of you may know I am in the UWA art and Design Challenge contest and one of my favorite builds in the UWA flagship Challenge was the design I made in January of this year. Besides the winning design the part I enjoyed the most was the use of lights and lighting/shadow effects throughout the build. From outside lighting of the build to shadows and sunbeams streaming through the upper floor windows. The build had a very real life light scheme to it and was a lot of fun to do and see especially at the midnight setting when you walked from one part of it to another.
The use of lights and lighting/shadow effects can take a build to an other level of complexity. Using the settings in the build/edit box in SL allows for many different effects. As with all things less is more with lighting effects.
There is nothing worse than a build that is over exposed with lights or even worse GLOW set to a maximum brightness effect. It looks like crap plain and simple to any one who has a good graphics card and their shaders turned on.
GLOW IS NOT GOOD set to max bright, please all glow whores read this and understand we do talk about how bad your art and builds looked with the over kill of glow on them!
In the edit/build menu the "features" tab allows you to set the effects for light on prims, You can control the intensity, radius and fall off along with the color you want the prim to be.
The intensity will control how bright it will be when you come close to the prim.
radius is how far the light will spread out and be seen.
fall off is how the light that is cast from the prim dissipates as it gets farther from the prim center.
Finally the light can have a different color than the color of the prim itself. This does allow for some great effects.
To properly see these effect you need to make sure that you Graphics settings are set to Nearby Local Lights. It also helps to have on the shaders and bump, mapping, shiny settings also. Depending on your computer and its graphics card ability will determine how High you set your quality and performance settings.
In summation this will allow you to have a multitude of light effects from color to distance and brightness a light can be seen in world.
Theres one other setting on the edit tabs
One of the best ways to get a good feel of how lights are working in a build is to walk through it and see how they look as you pass by them. I have always been an advocate of walking the build and getting a feel for how it flows over just camming it.
So take your time and make sure it feels and looks right and remember less is more when using lights in your build.
Also there was a discussion on graphic card settings in the SL viewer if you go to the Burn U LM - grab one from the notice board at the Burniversity group you will find prims with the textures settings on them.
Next came Raphaella...
Texture Seminar guest speaker Raphaella Nightfire discussing the creation of textures for clothing. As Raphella had 35 or so avatars all topless and in appearance mode we join the conversation. :)
1) What are templates?
Templates are an outline; a shape of a clothing article which the designer draws onto the avatar mesh provided in your inventory library under 'textures' then Avatar Body and Clothing Templates:
2) How to Use templates:
Locate the Avatar, Body & Clothing Templates...
Go into appearance mode, select - shirt. remove whatever you have on, then click to make new shirt - you will see a top box.. for the texture - under that a 'tint' box
In appearance edit mode, make a new shirt by selecting 'Upper Body Template'. This shows how the templates are made, with seam lines and contour lines on the actual avatar body.
I recommend you photograph your avatar in this template. It will be an invaluable reference on stretch and seams as you progress to designing clothing.
3) SAVE the templates on your hard drive. Next pull up the skirt, lower body and upper body templates click on each texture, then go to top left of your screen, click 'file' then 'save texture as' ....(name it something you will recognize and what part it is).
The textures are now available for you to start designing.
I WOULD SUGGEST.. You do a You Tube search / Second Life Clothing Designs there are lots of great tutorials and videos to watch and learn from.
4) How to get depth and 3d effects on clothing
Using the templates you can of course just lay a fabric over the template, shape using your cut tool, save that layer as eg: first shirt, upload in world and wear. But clothing is not 'flat'. It has depth and light, shade and wrinkles. These are respectively applied in layers.
You can do this by:
Applying a body shade layer over the fabric, then decrease the opacity level. Once you have the layer to the shading set, copy the fabric layer and place over the shading then use the opacity filters to get the effect you want. (applying various blending modes helps also and increases the options available to you).
So now cut the fabric to shape on the template, apply the shaders so you have the body shape under it. Next apply wrinkling or shadow layers. There are a couple of ways to applying a wrinkle or shadow layer by using the burn or dodge tool then blur it or make it opaque to the effect you want.
Or get out the premade Photo Shop brushes, you can find these by doing a Google search, there are some very good free Photo Shop brushes to be found. These apply an Alpha layer that you lay over your designs. There are some great ones for rips and tears … for grunge & jeans available.
FINDING TEMPLATES IN WORLD:
A search of 'clothing templates' in world search or on X street will offer a wide range of different selections - and price range.
Some template artists offer complete designs in layers in photo shop format. In this form, when you purchase the template in world you receive a box which contains templates for use in world, but may also offer the option to download the full layers in a photo shop format to your hard drive. In this instance, the box will contain a note card providing a download page URL and password so that the templates are delivered directly to your hard drive.
: DO NOT GO THROUGH THE SL BROWSER
go to the url; via your pc, other template artists offer the template OUTLINE, that is, the shape of the article. Many new clothing designers find these very useful as the template generally fits the avatar body neatly while allowing the new designer to add their own layers, fabric and trims to make an original article of clothing.
For the beginning designer, I recommend joining two groups which often have templates offered as gifts or on MM Boards:
Lucky Chairs for Builders
Midnight Mania for Creators
These groups also at times have offers of sculpt maps for accessories such as shoes, scarves, cuffs, pants bottoms etc.
[9:54] Nyx Breen: wonderful information Raphaella excellent we are running long so I am going to ask if there are any questions for you :)
[9:55] Nyx Breen: wonderful job thank you
At this time Starship Jefferson was the next speaker
Hello and firstly I would like to thank Nyx for inviting me, and say what an honour it is to be here. My talk is called ‘Ten Things I Wish I’d Known about Textures and their Construction when I Started Making them Three Years Ago’. Not all the ten things are techniques; some are ways of looking at things. They all took me a while to work out on my own (sometimes a very long while lol). Hopefully then, listening to my waffle will save you time when you make your own textures. I’m not an expert by any means, and there are many textures in Second Life that make me go very green eyed with jealousy. I will be very happy to take peoples’ questions at the end, or please feel free to contact me afterwards if there is anything I can help you with. Apologies if any of this is underneath your levels of proficiency, or maybe goes over your heads – it’s hard to know exactly what texturing ability to pitch this talk to. If I use technical jargon that you don’t understand then ask me at the end, or Google it at a later date.
1. The end justifies the means
What is a texture? A texture is the means by which colour, detail, and surface texture are added to a prim, or an assortment of prims. So how is this achieved? By inconveniencing electrons in order to change pixel attributes. This might sound like the most unhelpful sentence, but it is worth considering textures in these terms for a moment. A texture, like any other digital image, is composed of a grid of tiny squares called pixels. Through the use of a graphics program we are able to change each pixel’s attributes (hue, saturation and brightness) according to our whim.
When I began making textures I was always looking for the ‘right’ technique, the ‘best’ graphics program, and the ‘correct’ way to make brickwork, or glass for example. But it doesn’t matter how a texture is made, because no one is ever going to know exactly what process or program you used. There are no rules. There are many different ways to achieve the same effect. No one process is better than any other; it all depends what suits you best at the time. If you prefer Gimp then don’t listen to all the Photoshop lovers telling you that your program is second rate. All that matters is the end result. The end justifies the means.
2. There are two types of texture
All of the textures in Second Life IMHO can be divided into two groups; materials and 3D textures. Materials covers the entire range of surface textures that we encounter in real life, such as wood or rabbit fur, and some that we don’t, like dragon skin or alien flesh.
There are three ways to create textures of materials:
1. Make them from scratch
This is most commonly done by applying filters to random shapes. The internet abounds with tutorials on this subject, though some of them may not seem relevant at first. For example, there are a lot of tutorials that tell you how to achieve text effects like slime or flame, and these can be adapted for your use.
2. Adapt photographs
It is very satisfying to make textures in this way. Avoid taking photographs of surfaces that are in direct sunlight as they will have shadows and highlights which you don’t want as they will be directional. Portions of photographs can also be used.
3. Generate them with an image rendering program
Examples include the splendid Wood Workshop, which is completely free, and Filter Forge, which you can get on a month’s free trial. Textures made in this fashion often look a bit dull, so open them up in a graphics program and have a little play with the brightness/contrast, the levels, and the colour balance. Basically these programs have a range of presets and will generate a texture for you according to a limited range of controls. Their one big advantage is the time that they can save you. The disadvantage is that you’re limited by the whim of the software company.
A key element of materials textures is seamlessness. A 512 x 512 of polished wood that isn’t seamless will have a very limited range of applications when compared to one that can be infinitely tiled without producing an unsightly edge. An important ability to have as a texture creator is to be able to convert a non-seamless image into a seamless one. This is traditionally achieved through the use of the clone brush tool, and there are many tutorials on the internet to show you how. I would recommend watching a video tutorial, because it is one of those things that sounds very daunting and is hard to explain in words, but in actuality is quite simple once you get the hang of it.
3D textures are more complex than materials textures, and typically contain arrangements of materials. 3D textures are popular because they save builders prims.
There are two main ways of making 3D textures – by using photographs and from scratch. Photographs of building facades, for example, can be cleaned up and adjusted to make 3D textures. But making textures like this then you are obviously limited to what buildings are available. You can cut and paste features from one image to the next, and produce 3D textures that are composites of different photographs. Blending options will have to be used to complete the illusion. There are some outstandingly beautiful textures in SL that are made like this.
3D textures that are made from scratch are basically arrangements of materials. For example, a door texture may be composed of two types of wood and some metal on the frame and the handle. This is the way that I make textures. I’ve always thought it is a bit like dressmaking. Basically I make shapes of uniform colours, change the uniform colours into materials, and then apply blending options. Shapes can be made using the shape tools, the pen tools or the polygonal lasso. It is very important that you use good materials, in the same way that a top chef requires the best of ingredients. Either cut the material using the shape as a template, or fill the shape with the material. By using the blending options then shapes can be turned into forms. Once all the elements of the texture are completed then I finish the texture by adding clouds and noise, and usually by sharpening it very slightly, either by using the sharpen filter, or better still with the high pass.
3. Experiment! Experiment! Experiment!
This is so obvious I nearly didn’t include it. I never experimented enough to begin with because I always thought that my time was better spent ‘learning skills’. Graphics programs invariably have a feature called the ‘history’ which enables you to change your mind and revert your image back to a previous state. This means you couldn’t spoil it if you wanted. Note though, that the history’s use is limited – let’s say you applied effect A and then effect B to a texture. You might then decide that you really like effect B, but regret applying A. You would have to use the history to revert the image to a state before you applied both A and B, and apply just B again. You cannot just cancel A and carry on.
4. You can never do enough tutorials
Tutorials are like recipes. Once you’ve followed a few then you develop the ability to skim through them while noting what general principles are being used, rather than having to make each and every type of apple pie. You can never do enough tutorials. They will teach you many tips and tricks. Do tutorials that have nothing to do with textures and you will learn processes that you can then use on your textures. There are good and bad tutorials, but you can learn something from every one of them. Many tutorials employ a very destructive type of editing, in which layers are worked on and then flattened into one other. This is because the tutorial writers are very confident in their own abilities and trust themselves not to keep changing their minds about things. It is often therefore helpful for mere mortals to make duplicates of layers and hide them so that you always have undamaged versions of all the picture elements. You don’t have to stick to everything the tutorial writer says – when they say to apply certain settings to a filter, for example, then have a little play around and see what other effects that filter can produce.
5. Light and shadow will always be problematic
Textures in Second Life are actually very simple when compared with textures in computer games. Second Life has very limited light and shade capabilities. Fiddle about with the ‘sun’ setting on your viewer and observe how SL changes how it displays textures according to the time of day. You will see that it is very arbitrary and limited. Apart from this, SL has no means by which textures change according to which light sources are nearby. This has been achieved in computer games since about 1998 by using a composite of textures, or ‘maps’.
This provides both difficulties and opportunity for the texture maker in SL. When you don’t know where the nearest light source will be then where do you put your highlights and shadows? For a while I went with the vast proportion of SL texture makers and used the graphics industry standard of 120 degrees, but the problem with this is that it has quite dramatic effects – it’s like the sun in the evening when shadows are longer than during the day, and it can look really cool but problems arise when, for example, you build a house, and use textures like these on the walls. Because they all have the same dramatic directional light effect on them then they will look very wrong if you place light sources near to them. If you put a roaring log fire in the middle of the room then things won’t look right because the walls will all look like they are responding to a different light source altogether.
These days I always stick to 90 degrees, but adjust the altitude (sometimes called elevation) of the light source to 30 degrees to give the piece some depth. Most light sources in RL come from above anyway, so it’s quite a safe bet.
6. Be organised on every level
I learnt this the hard way. And I still struggle with it. When working on a texture, it is worth spending the time naming and colour coding layers, and organising them into groups. If you are making a door then it is so much easier if all the bits of door knob are in a little group named ‘door knob’ and not spread throughout the mesh of layers that a complex texture will have. 50 layers all called ‘Layer 3 copy copy’ will slow you down eventually, I promise. You may think you can just auto-select whichever one you wish to alter with the cursor, but it’s not always as easy as that.
Spend time arranging your workspace. Most graphics programs will let you load and save them. An awful lot of time can be wasted moving and resizing windows if you’re not careful.
Keeping your folders organised is important too.
7. Learn the basics
It will not be possible to make good textures without knowing at least the basics of a graphics program. Thankfully, they are all very similar and work according to the same principles. Thankfully too, you all have the internet available and this abounds with help pages on every possible tool, filter and option that your graphics program has got so Google anything you don’t understand. Tutorials are an excellent way to learn stuff. Practise and experimentation (as ever) are the key.
8.It’s all in the blending modes and blending options
Most newbie texture makers head for the filters and jazzy effects without realising that by far the most powerful tools at their disposal are the very dull sounding blending modes and blending options. Blending modes are used to determine how two layers look when they are placed one above the other. The simplest blending mode is ‘normal’, which hides the lower layer where it is covered by the upper layer, just as if you were looking down on two objects in Real Life. But there are many other blending modes which can be used to great effect. ‘Multiply’, for example shows only the dark parts of the top layer, whereas ‘Screen’ shows only the light parts. Experimentation is essential. Next time you place one layer on top of another then change the blending mode and see what happens. If you have ever made a layer semi-transparent then you have already been blending.
The blending options (sometimes called ‘layer options’) are really like special effects that you can add to a layer to adjust the way that it looks. They are very useful because you can tweak them at any stage (unlike filters), and they do not damage the image that they are acting upon. [PLEASE SEE IMAGE]
Most newbie texture makers discover the bevel and the shadow functions first. The overuse of both is a common feature to be found in textures around SL. The more textures I make, the less I have actually found myself using these. Nowadays I use gradients a lot more than I did.
9. Clouds and Noise are your friends.
These filters are often overlooked because their functions are not obvious.
They are powerful tools for making otherwise flat and cartoony images look more real and 3D. [PLEASE SEE IMAGE]As you can see, just the simple addition of clouds and noise has really started to give form to the shape. Noise looks like static on a black and white TV screen in its rawest form, and clouds look like umm clouds. They are both almost exclusively used in black and white. They should be used very sparingly. Less is always more. The top two layers of my textures are always clouds and noise, in that order, set to ‘multiply’ blending mode at a very high transparency. Clouds are always seamless, so long as you stick to image sizes that are multiples of 64 pixels. Clouds and noise are your friends
10. Textures are an art form
Texture making, like any art form, does not exist in a vacuum. Related disciplines, such as the practise of ‘faux finishing’, or replicating materials such as marble and wood with paint, have been going on for millennia. Even though you may think that making textures is some 21st century thing, then you are actually working in the grandest art tradition of all – that of tricking the eye into accepting a 2D surface as a 3D one. Realising this makes you appreciate that you can draw inspiration from a huge range of art. Scenery design, and the practise of ‘trompe l’oeil’ are not really so very different to making textures. The sets of old TV sci-fi shows were like textures because they were hand painted to look like arrangements of materials – panels and screens, buttons and dashboards for example.
You can draw inspiration from everywhere. When I started I spent far too long looking at other peoples’ textures when it would have been more helpful to have gone for a very long walk with my eyes open. You will find that inspiration sometimes comes from unlikely sources. I hope that at least some of this has made (some) sense to you. I haven't provided any links, but nothing is beyond a simple Google search. Wood Workshop, for example, is at Woodworkshop.com. Filter Forge can be found at umm Filterforge.com I'm reluctant to provide links to tutorials - there's so many you really can't miss them. I can't think of any in particular that have helped me more than any other - and I am reluctant to name them too for the reason that I would be endorsing them as the 'right' or 'best' way. Gimp is free, as is a month's free trial of Photoshop. Photoshop is best, but Gimp can do everything that all but the most advanced texture maker will need IMHO.
Thanks very much for listening.
Once again thank you all for coming and the artist for their collective time and expertise.
Good Building and Texturing
Nyx
Tuesday, June 8, 2010
When Too Good Is To Good
Sometimes it's a matter of degrees, sometimes it a matter of taste and some times its just not explainable how art can be looked at by one individuals and seen so different by another. Some believe it's in the eye of the beholder or some times it's in the eye of whats best for what serves the purpose of an individual or a group.
So as an artist you just have to learn to deal with the motivations and pressures that come into play when individuals place your art up in front of their so called collective judging eye. Just remember that too good or too different or too not the same is not too bad.
So keep building and believe in your self and not in the collective so called wisdom of the so called critiques and it all works out in the end.
Good Building
Nyx
Sunday, May 30, 2010
Burniversity Announcement
Burniversity Second Life - May 30th,2010
Well as many of you know I do enjoy participating in the world of creating and especially building be it an architectural or artistic format. So it is with great pleasure that I would like to announce that I have been asked and have accepted the position of Dean of Burniversity (I think of it more as the janitor).
My predecessor White Lebed is expanding her virtual world to new and exciting opportunities. But, White will still be assisting me as I transition into the position, so yes we will still have to genuflect as she passes by. I would like to thank all the members of the board who showed a vote of confidence at the meeting and I look forward to assisting and help the Burn world grow and become one of the premier locations and events (which there are many) in Second Life.
As I told the board when I was asked what I saw Burniversity and its relationship with the Second Life community.
Burniversity is the ongoing connection to the Second Life community during the course of the year when the main events are not under way. I see it as the outreach portion of the Burning Life experience where any individual can learn, participate and experience the creative and entertaining portion of Burning Life in a supportive, constructive learning and competency developing environment. Where experienced individuals from all faucets of the Burning Life world mentor, share and enrich all who participate.
I want to state that experience is solely based on the performance that an individual has demonstrated, it is not based on accumulated time or who knows who or what group they belong to.
As for my individual experience I had very limited in world or building skills before I rezzed into Second Life. Yet there was a natural affinity for the competencies required and I was able to transition into this process quickly. So I believe that any one can learn and grow in this medium. So that stated the Mission of Burniversity is too built upon what has been done and expanded it so that it will encompass all aspects of the Burning Life experience. So I will be asking each of you no matter what skill sets or experience levels you have attained to date to participate and share some of the experiences, challenges and expertise you have in your own fields during the course of the upcoming year.
One of the first courses of action I will be undertaking is to look at ways to increase an interactive relationship with Burniversity and the members of the group. There will be an “Idea Box” placed on the Burn U lands in a new Information Center that will be developed for up and coming events and procuring of knowledge, tools and information. I am asking anyone who has an idea or concept to please drop it in the box; it will be looked at and considered.
Second, I will be updating all the Burniversity Wiki info this will become a repository for knowledge and skill sets that will increase an individual’s experience in Second Life.
Finally, for now, I will be continuing the Artist and Builder forums that White had started on a monthly basis so if anyone has an interest in being a presenter please forward a note card on the topic and format you would like to present to the group. The more information included in the card explaining it will be helpful.
Again I look forward to the upcoming events SLB 7 – Burning Man and the many upcoming Burn World interactions in the future. Along with the time we will spend as a group at Burniversity.
As always good building and have a good time in your Second Life.
Nyx Breen
Burniversity
Thursday, May 27, 2010
Things that make you go Hmmm
As with all things in life there are the things we take for granted and there are things that make you go Hmmm. This often happens in Second Life to an extent that it may be a little more common than real life. When I first rezzed into SL and began to explore and see this truly strange, amazing, bland and boring world it slowly dawned on me that things that are common are usually taken as the norm, be it RL or SL. It gets to the point where individuals accept them as the standard. Then there seems to be a comparison based on this baseline that has been set by the collective. So the middle of the road, the common, the, it’s ok it will pass is the standard from which all things are based on in a virtual world. This seems perplexing to me, a place where flights of fancy and creativity can be let loose and nurtured to the tenth degree. Yet individuals want the common more than not, when it comes to many things that are created in virtual worlds.
My indoctrination into SL was I'm sure no different than anyone else's, I rezzed in world, was asked if I wanted to be bitten and made a vampire. Then I flew to the zyngo/gambling clubs then off to a stripper bar while visiting all the welcome places to hear 20 year olds insult everyone and think they are cool as spammers plastered the screen with visual spam. All seemed normal for a video game to me.
But slowly and surely I did discover there were other places in SL, lots of other places that had been created by individuals who saw this so called video game as something different. Not an extension of RL as a copy of the norm, the expected, the same old, same old. But, individuals who had a vision that was different. You can tell when someone has a passion for a vision and they work at it, it may not be the most technically correct build, it may have a flaw here and there, but there is a feeling that one gets when you experience it. A shared experience that this is something special, it’s different, it was from someone who took the time to find what was in them and share it with others.
To those individuals the ones who take the time to make it right, go out on the limb, out of the box and make your eyes open and your mind expand when you share their vision, I salute you. This is not limited to just a builder of buildings, the art of artist or a creator of textures or pictures. Be it a scripter or animator, the noob who’s done their first build or a gifted creator of machinima it is recognized and appreciated when it is seen. Hopefully as more and more individuals learn and master and expand their abilities in virtual world creations. We can collectively raise the bar and the norm from the real world will not be accepted as the baseline for a virtual world.
So the challenge I place in front of all the creators in virtual worlds is try it a little different take the step to expand your vision and share it with others. You may find that the shoebox build or same old same old may not be what every wants, there may be an audience waiting to share with you.
Good Building
Nyx
Subscribe to:
Posts (Atom)
