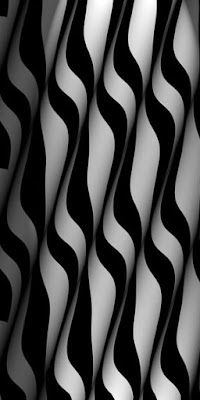
I have included some basic textures that I use to develop or correct on the fly when an issue comes up during a build. They include a texture to help with glimmer when one side of a prim is light and the other is dark, such as the ceiling and roof textures on the same prim. Also included are some simple graphic designs that can be used to create some very visually striking designs when applied to textures and tweaked to the desired effect.
The best way to use these is to apply to a prim, shape the prim and then arrange and tweak the texture to the desired effect. I have found using offsets and angles with the textures and multiples gives a wide variety of looks to one texture.
Then use the the "UI - color under cursor" to match the tint of the texture your are working on to the surrounding prims and you have a great looking fix or creation on your build. Hint* often due to the color of the texture being tinted you will have to move the tint guideline numbers RGB - HSL to get it to match perfect.
Here is an example of a textures I carry in a folder on all jobs I do.
The first set I use I call Correction textures, they help eliminate glimmer and shimmer or alpha edges in builds. This texture is applied to the not seen section of the prim that has a light side and an opposite dark side to the prim. By tweaking and tinting you should eliminate any and all glimmer.

The next set I use for creating effects on prim to match designs on builds I may not have the original texture or want to create a fast unique texture with out going into photo shop or gimp. Sort of a fast fix on the fly which does work very well. This set consist of several different types of black and white textures from straight lines to waves and circles, depending on the build and texture needed at the time.

You can also create your own set of work texture tools in photo shop or gimp, I have done some simple straight forward ones in stone and wood which can help in many styles and types of builds.
* Included are two sample of this, I want to thank Infiniview Merit for doing the original samples for me and the more advanced looking one. Since that time I originally spoke to him abut this concept I have taken the time to learn how to use the Photo shop program I have correctly. Thanks again Infiniview.


One of the things I do enjoy is using the sets to create one of a kind looks on walls or columns, so be creative and expand your texture tool box.
All of the textures seen and additional ones can be acquired in world at the Prim Pushers location on the Waka Sim 33 95 45
http://slurl.com/secondlife/Waka/33/95/45
Nyx


Well finally a blog for not the same :) thanks for the texture tool box textures wa a little doubtful at first but was surprised how many unique variation i was able to make using them and the tint options, yes the UI under cursor is a great tool thanks. Oh nice japanese cottage :))
ReplyDeleteThank You, yes it took me a bit to figure out what I wanted with these. Then without the examples I had found source free on line I tried to explain to Infiniview what I wanted. LOL
ReplyDeleteIt took a bit, but finally he got it! Then I did some more research on line found some nice ones that worked not all do! Finally I started learning how to use Photo shop correctly and make textures for most of my builds now. But still always have my favorite Texture artist in world and do shop for T's alot. I guess once a Texture Whore always one.